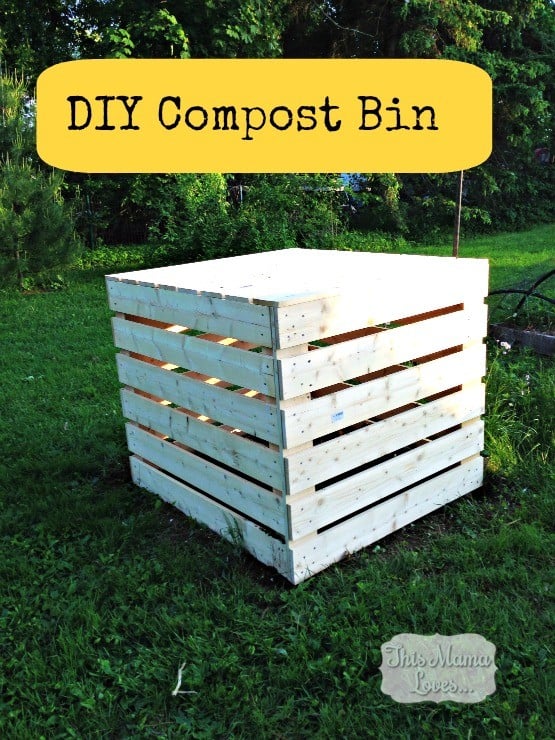
DIY Compost Bin
I shared with you our existing compost bin a few weeks ago- very simple, and has been very functional, but it was time to update and redo it. Too many heavy winter storms, branches and even a tree have hit it.
One of the things I’ve discovered while working with The Home Depot as part of their blogger program is how much more they have on their website than just products. You can find project plans including materials lists so that you can check things out, figure out what you want to make, and print out the lists before you head to the store. My husband is always the one who does the project planning logistics- like how many screws, what kind, what size, how much sheetrock, what kind of sheetrock- what kind of wood, sizes, types…all things that are far beyond my abilities. I was able to do ALL of the shopping for the supplies to build your own compost bin BY MYSELF (well, with my 3 year old helping). I didn’t need my husband to do the math and figure out how many of each item we’d need, it was all there for me. I was super proud of myself for doing that shopping solo.
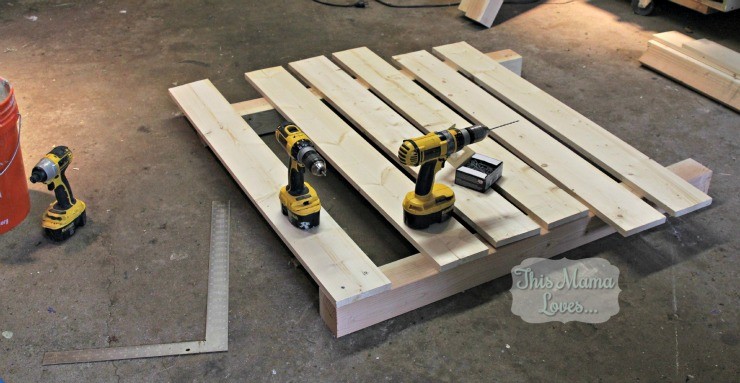
Of course, the materials called for on the website are almost all cedar boards- something that most Home Depot stores don’t carry in stock, you have to special order them (which I did not have time to do). So we modified with pine boards and I’m on the hunt for some non-chemical stain or sealant to keep the compost bin intact and help it to last as long as possible. Cedar was the best choice but time was not on my side. On a side note, I always assumed cedar boards were far more expensive than pine boards, but they really aren’t. If you DO have the time, I’d absolutely recommend doing the order and going for cedar. It’s naturally made to withstand the elements for longer than pine and you’ll get more time with your bin.
If you do grab pine like we did, be sure to pre-drill holes into your boards before you screw them to the posts or you will likely have lots of splits from the screws. It’s worth the extra time spent, and really doesn’t take much extra time.
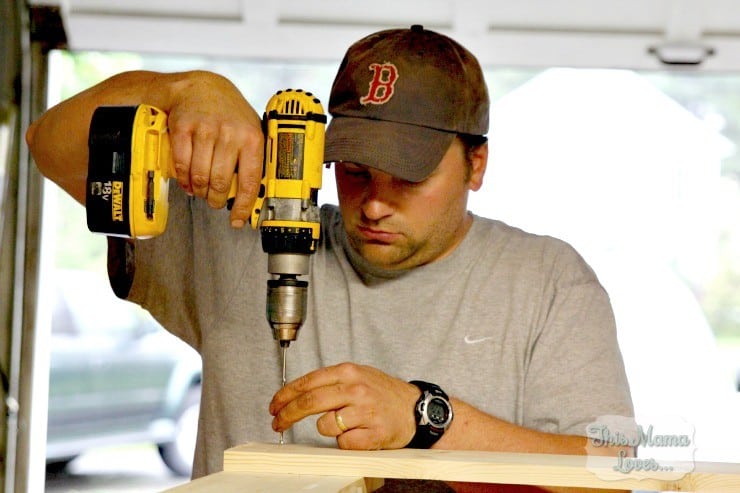
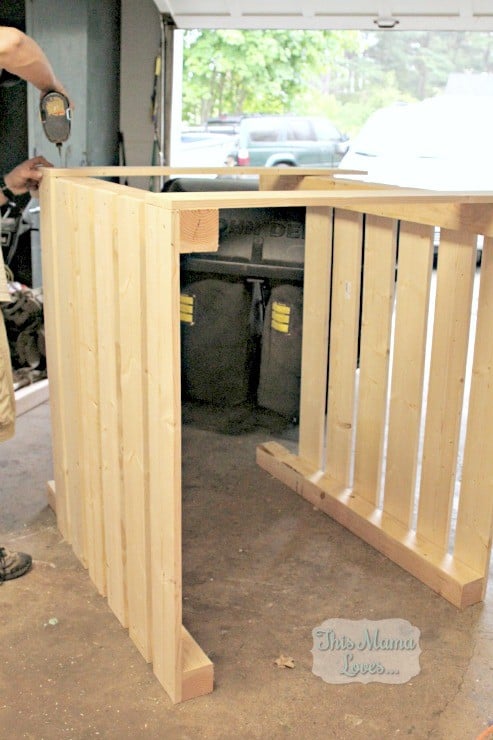
The compost bin plans didn’t specify how far apart to space the boards so we did an inch and a half between boards. The supplies and cuts are clear and concise but for the how-to, there’s a bit of detail lacking. One thing we immediately noticed was the plans call for 4 sides of the bin and a top- the bin is approx. 4 feet tall….we weren’t sure where/how that would allow you to use a pitchfork to turn the compost nor how you could remove it, so instead of following the plans exactly, my husband made the front panel removable, mounted on a cleat made from a 2×4 at a 45 degree angle (see photo below).
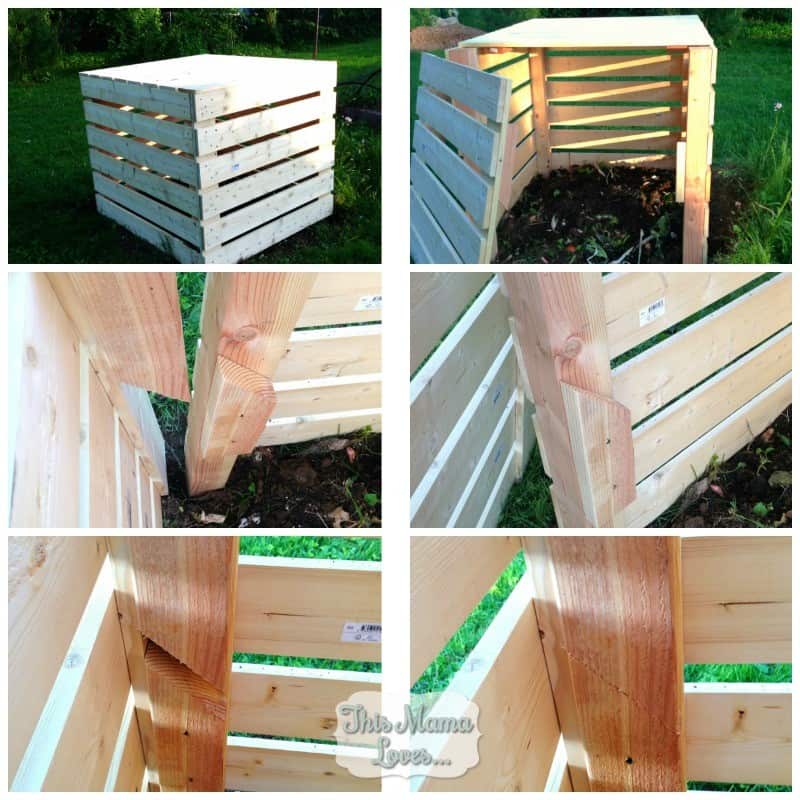
We chose to do this for the above reason- access to turn or remove the compost, but also because our kids are very much a part of our composting and gardening and they bring the compost scraps from the house down frequently and can’t reach a 4 foot roof to move it and empty the scraps into the bin, and they also like to bring worms they find in the yard to the compost. They like to put the worms in and watch where they go after they are in the pile. Having 4 closed sides would kind of take that away from them and my kids really enjoy it.
All in all, this was a fun project- something we needed to do, it’s far more aesthetically pleasing than our old compost bin was, and my husband and I got to spend several hours working on a project together, just like we did pre-kids. The kids helped us to decide to keep the height as specified in the instructions and also helped to decide that they could work together as a team to get the front panel off and be able to access the compost by themselves. They love being a part of our gardening as a family activity and are all three of them excited to add new “pet worms” to the compost to move the process along.
It’s home improvement time, and The Home Depot has everything you need to #DigIn for Spring. No matter what projects you want to tackle, they have great values on all you need. They’re ready to help you with renovation ideas and expert advice, too.
Get over $300 in email exclusive savings each year, sneak peeks on new products, monthly lawn & garden ideas for your region and access to The Home Depot’s gardening experts. Click here to join the world’s largest garden community today! Or go to homedepot.com/gardenclub to see some of the many benefits of membership.
This is a sponsored post written by me on behalf of The Home Depot.
Luda says
I saw many different ways to build compost bins using palets. This one is quite different design, thanks for the idea.
Liz @ A Nut in a Nutshell says
My daughter made one and swears just like you that it wasn’t that difficult! I do have a big enough yard so that I could keep it a good distance from the house as it does its thing…hmmmm
Jackie says
I have a garden but it’s lacking in good dirt…. we have clay in our yard. Because of that I’ve pondered starting my own composting pile and this could help. I just need to get out there and do it.
Kerri says
Great project! If I had a big back yard, I would definitely do this. When I taught third grade, we had a plastic bin in the classroom and it was fun to see the transformation of the soil. Where did that banana peel go? was a ? in my students’ minds.
Brett says
That is cool! We also find a lot of things grow in there – we had a huge pumpkin sprout and grow from the compost!! It’s also what got us started growing potatoes.
Sara @ Mom Endeavors says
Great project! Would love to do a bin!
Mer says
That looks so nice! Definitely better than my bin. I really like the changes made so the kids can help.
laurie damrose says
I love this idea for my gardening.
Theresa @DearCreatives says
I really want to make one. Although our yard is smaller, we could make a smaller version. I love being green, why not greener, right? 😉 Thanks for the diy. Theresa @ DearCreatives.com Pinning it for the Mr.
Jenni says
I had no idea that Home Depot offered these products or plans, what a great thing!! That compost bin is great! And I like how large it is.
Stefani says
I love it. I want to have one but I think my dog would mess with it.
Brett says
You could make one like ours- dogs can’t get into it (if they can, you should video it LOL)
Beeb says
Your compost bin looks AWESOME!
Liz @ A Nut in a Nutshell says
You guys were pretty smart to figure out a workaround for the areas where the instructions lacked a little bit. I hope this works out beautifully for you!
Brett says
Thanks!
Dawn Lopez says
Oh wow! That looks awesome and maybe a lot simpler than I would have thought! Thanks so much for this!
Ashley - Embracing Beauty says
What a great project. Thank you for sharing! I would have never thought I could have made my own.
Angela says
I am so glad to find this! I have been hesitant to start a compost bin but this is totally doable and not at all an eyesore like I expected a compost bin to be.
Janel C says
This is so cool! We want to have a compost pile but just don’t have any room in the backyard.. definitely whenever we finally move, though, I want to do this!
Brett says
You could do a small one. or a worm one!
Tesa @ 2 Wired 2 Tired says
It looks great! That good to hear that you were able to make adjustments as needed. It’s funny that they didn’t leave a side open but it sounds like your solution is perfect because now your kids can help too. I’ve enjoyed following your project along, I hope to make a compost bin one day!
Kristyn says
what an awesome and well built compost bin!
Marina says
We’ve been making our own compost with food scraps but making a dedicated bin in such a neat idea. Have to show this to Hubs!
Brett says
It was pretty easy. Especially with my husband helping!!
Michelle says
Cool! We made a similar one but instead of building the panels, we used shipping pallets! We just asked for them at a construction site. http://www.eatniks.com/2010/06/shipping-pallet-compost-bin/
Pam says
Thanks for sharing. I have been wanting to make my own compost bin. Now I know what to do!
Anne - Mommy Has to Work says
You all did a great job! made one out of a rubbermaid tote one time
Susan says
I would love to make my own compost bin, this is a great project thanks for sharing.