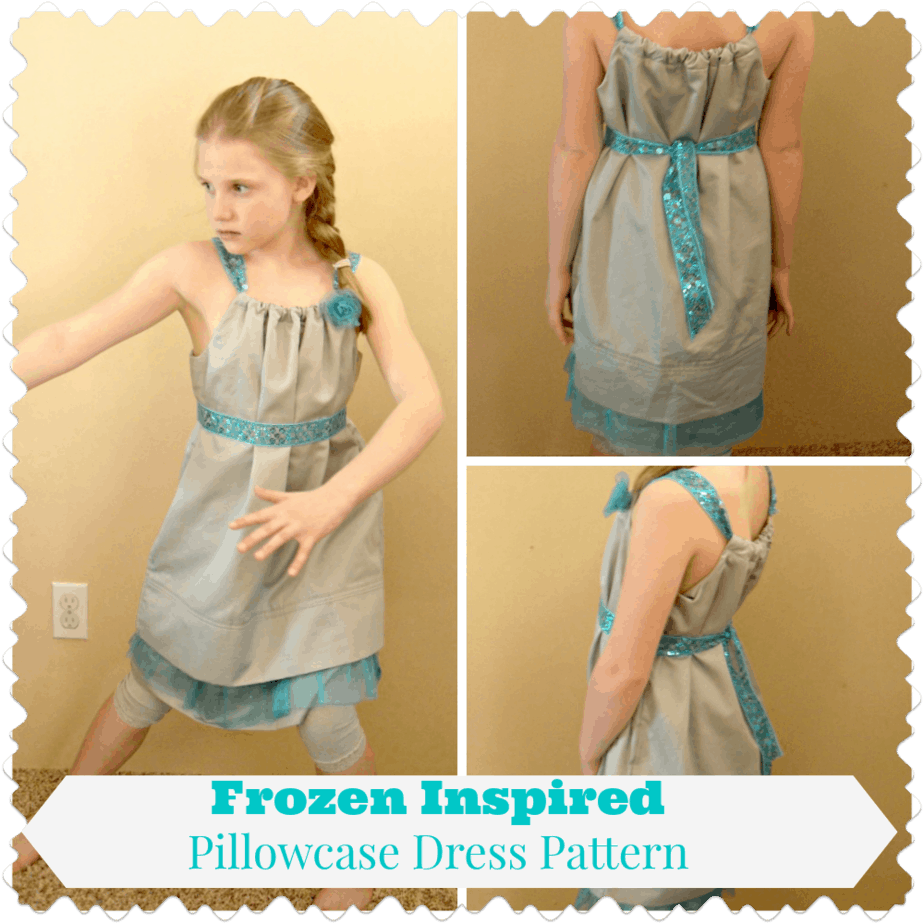
We’ve all seen the adorable pillowcase dresses in many variations. Most are easy to make and very simple in style. Here is a twist on that simple project to create a beautiful little girl’s fancy dress! The colors and sparkles make this Disney Frozen Inspired Pillowcase Dress Pattern perfect for your princess! What little girl wouldn’t love this?!? And, yes, it is still easy to make!
Disney Frozen Inspired Pillowcase Dress Pattern
 You’ll need the following supplies:
- 2 regular pillowcases of the same size & color (the higher the thread count, the nicer and dressier the fabric will be)
- Thread to match the pillowcases
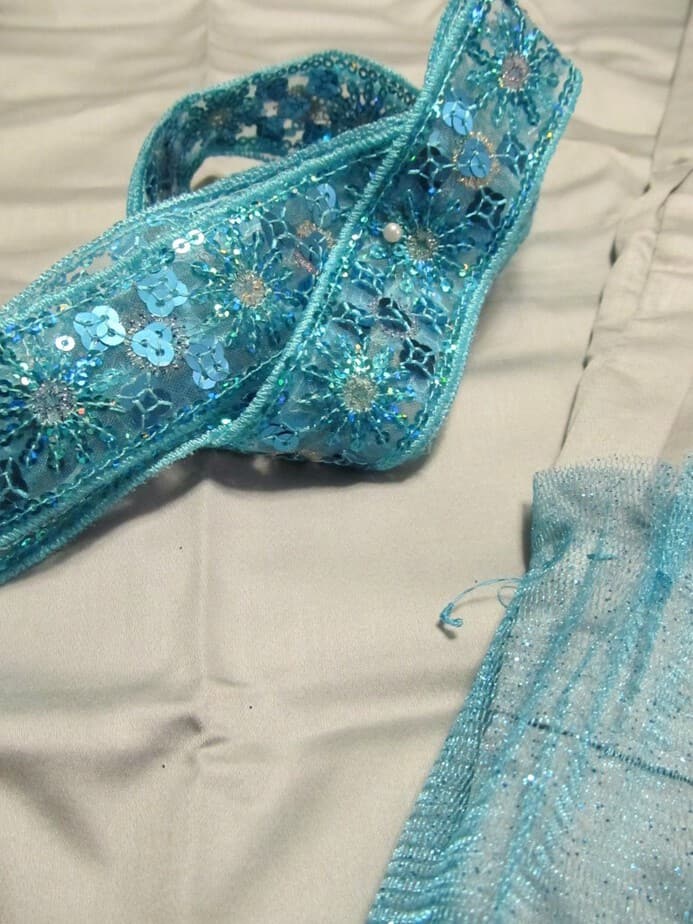
- Approximately 18 yards of ribbon in a contrasting color (I used a sequined ribbon, about 1 1/2″ wide)
- 1/4 yard Tulle in a similar color to ribbon
- Thread to match Tulle
- Sewing machine
- Pins for pinning into place, safety pin, & needles for hand sewing
- Scissors
- A dress you know fits in length & arm holes for template only
Step 1
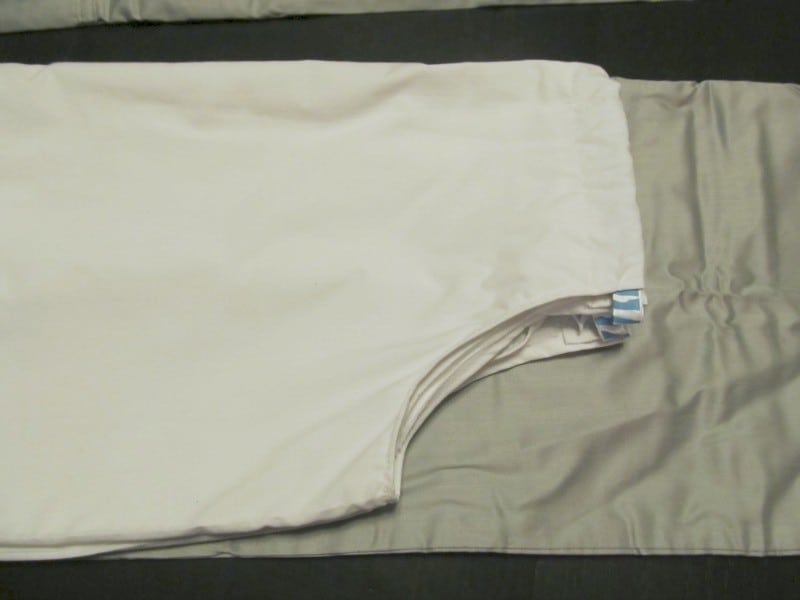
Fold the first pillowcase in half lengthwise and out on a flat surface. Lay the template dress out on the first pillowcase and determine the correct length by lining the bottom of the dress up with the open end of the pillowcase. Mark a straight like across the opposite end of the pillowcase which will become the neck of the dress. Next, mark the arm hole lines. Carefully cut along marks
Step 2
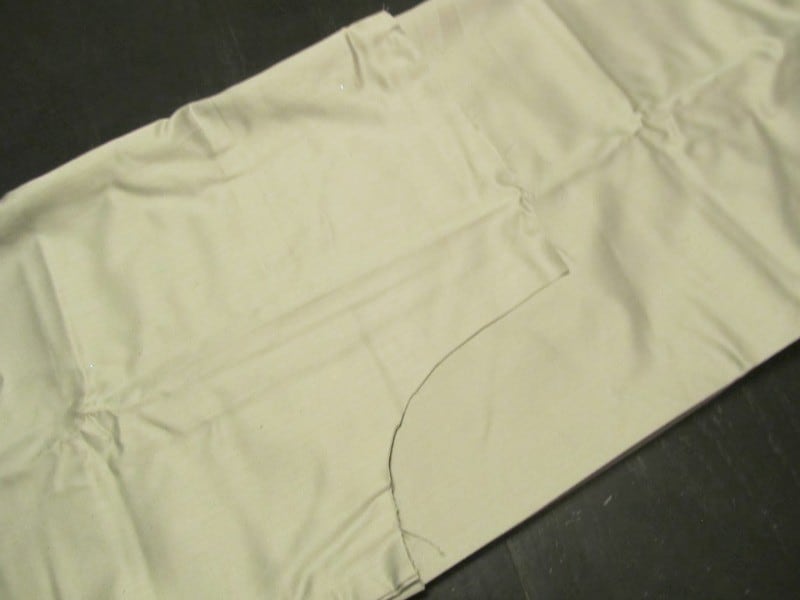
Determine how much shorter than the bottom layer you want the top layer of the dress to be. Lay the cut pillowcase over the second pillowcase (both still folded in half lengthwise) and adjust the bottom (open end) to be the desired length. Cut the top and arm holes into the second pillowcase as done in step 1.
Step 3
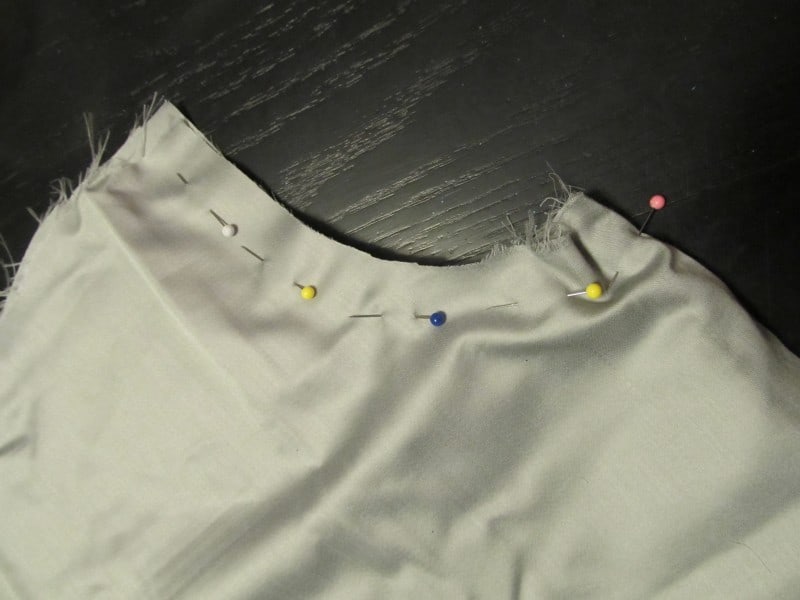
Now you’ll sew the two layers of the dress together. This might be the tricky part as it took some time to make sure that once sewn together and turned out everything would be right side out. You’ll place the shorter, top layer right side out inside the longer layer which is also right side out. Pin the two layers together along the arm holes and straight top. Sew approximately 1/4″ in from edge, following the contour of the arm hole.
Step 4
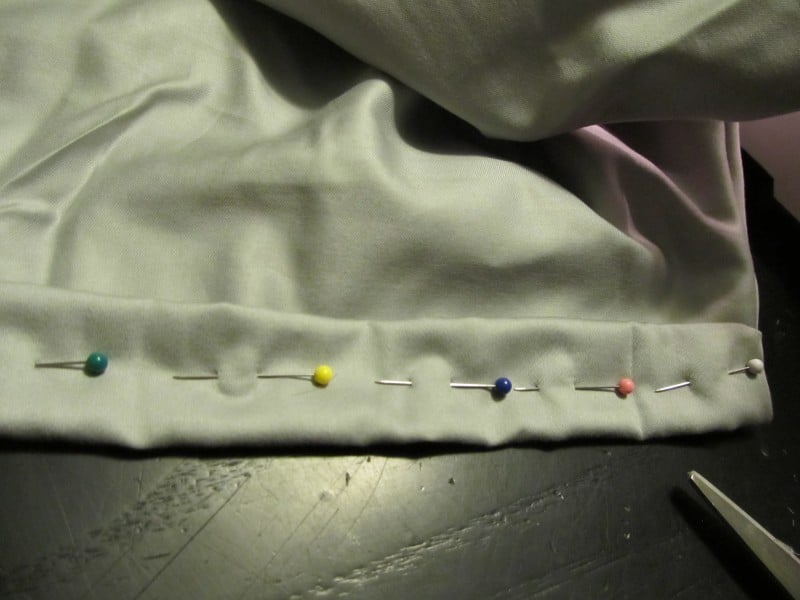
Turn top layer right side out over the bottom layer. Fold approximately 1 1/2″ of the straight neckline over, pin into place and sew. This will become the ribbon pocket for the neck.
Step 5
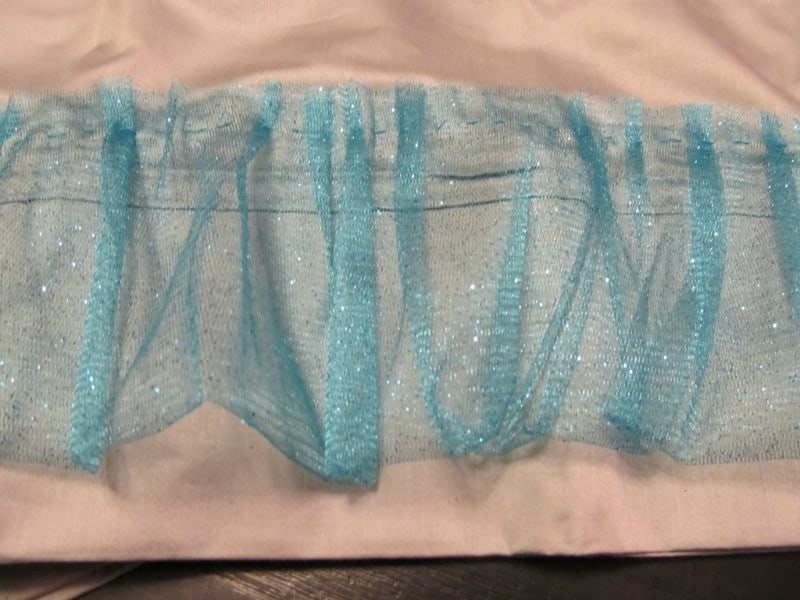
Cut the tulle into 2 strips legnthwise (approximately 6″ each”). Fold one piece in half lengthwise. Using the matching thread, begin gathering the tulle onto the thread (you’ll sew at the open side, creating almost a tube). Gather the entire length onto the thread. Once you’ve completed this, you’ll begin tacking it to the bottom pillowcase. The folded edge of the tulle should be approximately 1″ above the open end of the dress and the sewn edge should fall under the top pillowcase. As you tack the tulle to the pillowcase, gently pull the thread it is on to create a gathered look.
Step 6
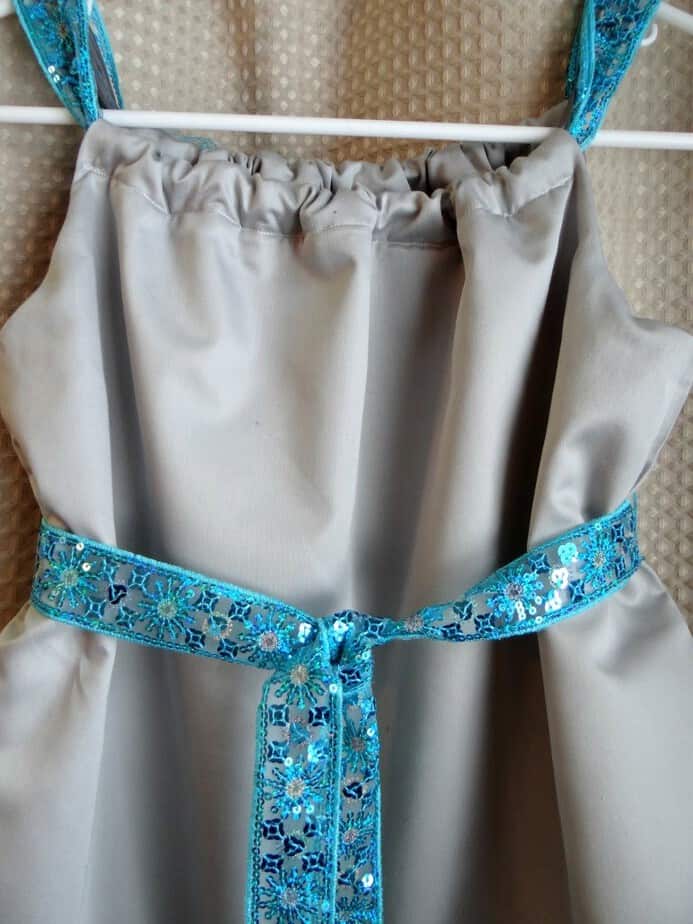
Using several layers of thread, create a loop at each side seam that will be large enough to slip the ribbon sash through. This can be placed at waist height or higher to create an empire waist. Slip your ribbon through both loops and cut to length. You’ll want it to be long enough to be snug around the body and either tie in a knot or bow in the back with tails left to hang.
Step 7
Pin a large safety pin to the end of the remaining ribbon and begin feeding it through the ribbon pocket at the neckline. Feed through both the front and back. This ribbon should be long enough to create straps when the pillow case is gathered in the front and back to create a scooped neckline. You can either sew the ends of the ribbon together and slide the sewn ends into the pocket or you can leave it longer and tie it when it is put on to be worn. I chose to sew the ends and conceal them which left the perfect place to add a little tulle flower!
If you’d like to make a tulle flower, cut the remaining tulle into a 3″ strip. Fold it in half and begin gathering it onto your needle and thread at the open side. Gather a little to a time and pull it tight, draw your needle through the gathered portion and gather more on. Repeat until it begins to look like a flower and reaches your desired size. Sew into place at one side of the neckline.
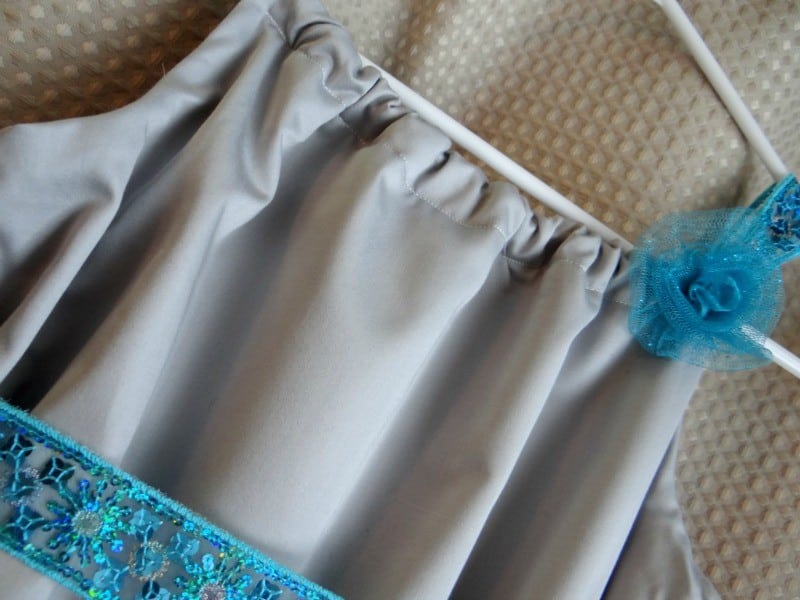
Press the entire dress and it’s ready to be worn! Who would guess this was a pillowcase?!?
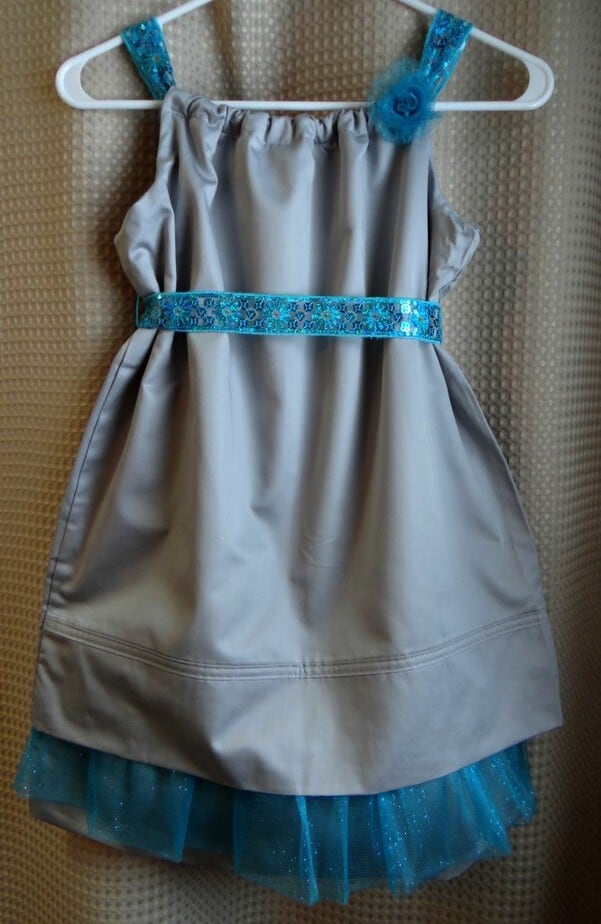
This dress had a total cost of $22.00 in materials and approximately 3 hours of time.
Randi S says
This is adorable…I wish I could sew!!
Heidi Embrey says
Very nice. Thanks!
Addie F. says
That is absolutely adorable! Frozen is so huge right now; every girl would love to wear it. And your instructions were very clear, which is always nice.
Shannon says
Is it weird that I want this in my size? LOL…NICE work!!!!